

Ultimate Guide: A Step-by-Step Tutorial on Building and Organizing Your Pedalboard for Perfect Sound
Thomas LeeSo you’ve conquered chords and slain some solos. Now that your rhythms are running smooth and you’ve earned some wicked callouses, it’s time to expand your horizons and experiment with the sounds that revolutionized rock.
Maybe you’ve already picked up a guitar pedal or two and discovered the creative freedom of tinkering with effects. It’s a journey that never ends, but it really starts when you first find yourself seeking a better solution to organize, order, and optimize your rig.
In this article we’ll pull back the curtain on what makes a great pedalboard and how different set-ups can influence your sound.
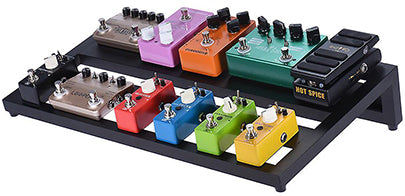
But first things first: What is a pedalboard? At its most basic, it’s a frame on which to securely fasten, sequence, and wire guitar pedals. From simple DIY wood boards with hook & loop attached to custom-built multi-tiered pro boards with built-in electric and road cases, there are a dizzying array of sizes and features to choose from. Determining how many pedals you have, how you’ll use your board, and of course your budget, will help narrow down the best board for your needs.
Now that you know what a pedalboard is, you might be asking: “When should I think about building a pedalboard?”
Basically, if you have more than two pedals in your arsenal, the advantages are clear. No more nests of long trailing cables to trip on or muddy up your sound. Forget fiddling with questionable power supplies. Gone are the days of your precious pedals knocking around in backpacks and getting punted halfway across stage. By firmly affixing and sequencing your pedals in a way that makes sense, you’ll get the best out of what you’ve got by protecting and optimizing your gear while leaving room for further expansion. So let’s get into it.
Of course, when it comes to music there are no real rules, but the standard sequence of pedals is as follows:
Guitar > Tuner > Wah > Compressor > Distortion/Overdrive > EQ > Modulation > Volume > Delay > Reverb > Looper > Amplifier
Below we’ll provide a description of each type of pedal as well as the reason for its place in the sequence. After that we’ll discuss the all-important matters of wiring your board for power and sound.

The first pedal in the signal chain and the most important. It may be simple, even boring! But no amount of distortion can mask an out-of-tune guitar. Placing it right at the beginning of your chain allows for an accurate reading of the guitar's signal that distortion and reverb can obscure.

This pedal is a type of filter that produces the signature voice-like sound that its name suggests. It works best near the front of the signal chain since it tracks your guitar notes as you play them and therefore benefits from a precise, undiluted input. Harmonizers, pitch-shifters, and Whammy pedals share similar qualities that benefit from this placement.

These pedals cut-off both the loudest and quietest values of the signal, creating a “hotter” mid range. They are placed after wahs and pitch-shifters that work best on a fully dynamic, uncompressed signal, but before distortions and overdrives which can add unwanted volume to peaks and valleys.

Overdrive and Distortion Pedals
The sound of these pedals is best described as “cranked up and stepped on”. They provide a gritty, crunched sound packed in fuzz by compressing peaks and enhancing overtones. They are responsible for many of the qualities associated with rock and metal. There is no consensus on whether one should come before the other, so get in there and experiment!

EQ stands for equalizer. These pedals provide a little more flexibility to target specific parts of the frequency range by either boosting or cutting them. You could think of it as “washing” the sound to better focus in on the tones you want to be heard, or simply to regain volume that previous pedals may have stripped away. EQ comes after the wah, compressor, and distortion pedals so that all of these effects can be tuned to perfection.

These pedals modify tones with effects like vibrato, chorus, flange, and phase. They seek to mimic real-world oscillations of sonic movement. The resulting pitch and time fluctuations provide a treasure trove of creative sound potential. In keeping with their spacial aspirations, you may find them sounding best when working on all previous effects. Adding them before distortion, however, can lead to some mind-bending results!

Volume pedals allow you to control the volume of an instrument in real-time. By using your foot to manipulate the pedal, you can smoothly increase or decrease the sound output without adjusting any other settings on your guitar or amplifier. This versatile tool allows you to add expressive dynamics by creating swells, fade-ins, or fade-outs, and achieve seamless transitions between different parts of a song. A volume pedal should go before any time-based pedals to allow for the continuation of time-based effects when even when the volume is at zero.

These pedals include reverb, delay, echo, ambience and tremolo. If modulation creates “moving sound”, then time-based pedals create an “environment” for the sound to move through. It’s common practice to have these near the end of the chain, but play around as always.

These pedals “record” what you play and play it back again on a loop. This is recommended as the final pedal in the signal chain for practical reasons, so as to capture the entirety of the sound you’ve layered to this point. It is only logical to end with it.
Finally, the amplifier is waiting to blast your custom crafted sound for all to hear!
Your choice of pedalboard depends on how many pedals you have, how many more you’re likely to get (hint: there’s never enough), and how you’ll primarily use it. If you’re the type to take the show on the road, you might consider a smaller, more portable and rugged model for travel and convenience. On the other hand, if you’re tinkering in the studio with a wide range of effects, you can worry less about ruggedness and more about real-estate. But in either situation, try to think ahead. It’ll be more economical in the end to invest in one that can serve your ambitions down the line, so plan accordingly.

Locking It Down
Assembling your pedalboard means mapping out the order and placement of your pedals and then securing them to the board. We suggest using our Pedalboard Grip Kit to lock your pedals in place and keep your cables under control. Thanks to the industrial strength 100% nylon hook and loop design, your pedals stay in place, yet are still easy enough to remove if you decide to reconfigure your board.

Wiring For Sound
The first rule of wiring your pedalboard for a clean signal is to make your patch cables as short as possible. Remember; the longer the signal chain, the greater the “impedance”, which can introduce unwanted signal noise and ruin your carefully crafted tone.
When it comes to patch cables, you have a few options. If you’re looking to keep things simple, pre-made patch cables are available in a variety of sizes. However, this can lead to a messy and undesirable look. The second option is DIY patch cables. Since every pedalboard setup is as unique as the minds that create them, this approach allows you to customize your cable lengths for a tidy and professional looking board.

DIY cables can be soldered or solder-free. However, if you don’t know how to solder, we recommend using our Solderless Pedalboard Cable Kit. Our cables are some of the most affordable and easiest to assemble on the market... meaning you save time and money for other gear. If you’d like to do a deeper dive on patch cables and what the differences are, check out our article “Soldered vs. Solderless Patch Cables - Which One Is Right For You?”.

The importance of a well-managed power supply can’t be overstated. Cutting corners here can not only lead to unwanted signal noise, but also puts you at risk of frying a pedal’s circuits if done incorrectly. Because of this, we recommend the use of a fully isolated power supply. This is undisputedly the best way to avoid that unpleasant background buzz, as well as adverse electric interactions between pedals, that can come from “daisy chaining” with unisolated supplies.
The advantage to “daisy chaining” is it’s ease of use and affordability. But keep in mind that your pedals will need to be of a uniform voltage, or else this method will not work! Thankfully, most modern pedals run on standard 9V DC, but some can come in 12, 16, 18 or 24 volts, especially when using older pedals.
You’ll also need to consider the current necessary to power the pedals you plan to use. These are the numbers marked “100mA”, “300mA” etc. on your pedals. Add them all up and you’ll have the total required current for your pedalboard.
(Note: those insisting that 9V batteries are superior have clearly never experienced the agony of running out of juice in the middle of an encore.)
A Final Thought
Pedalboards are all about discovery and experimentation. What started as an invention of necessity in the 1960s has bloomed into a galaxy of sound that’s been driving innovation in music until today. Hopefully we’ve shed some light on what it takes to build a great pedalboard and you’re ready to embark down the sonic highway of guitar pedals and pedalboards!
*As an Amazon Associate we earn from qualifying purchases.